
Forklifts batteries
Toyota Forklift Batteries by Model
Select your Toyota model to see the battery configurations matched to it.
- Equipment type
- Forklifts
- Manufacturer
- Toyota
- Models supported
- 297
- System voltage
- 24V
- Chemistries
- Flooded Lead Acid, No Maintenance, Gel
297 results
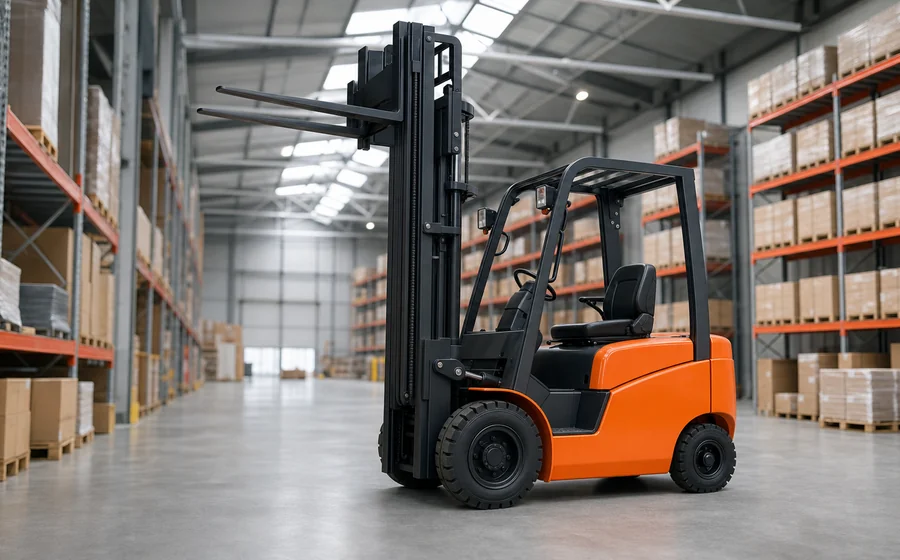 Representative forklift image — exact model image not available2FB7Battery options
Representative forklift image — exact model image not available2FB9Battery options
Representative forklift image — exact model image not available2FBCA10Battery options
Representative forklift image — exact model image not available2FBCA13Battery options
Representative forklift image — exact model image not available2FBCA15Battery options
Representative forklift image — exact model image not available2FBCA20Battery options
Representative forklift image — exact model image not available2FBCA25Battery options
Representative forklift image — exact model image not available2FBE10Battery options
Representative forklift image — exact model image not available2FBE13Battery options
Representative forklift image — exact model image not available2FBE15Battery options
Representative forklift image — exact model image not available2FBE18Battery options
Representative forklift image — exact model image not available2TE15Battery options
Representative forklift image — exact model image not available3TE25Battery options
Representative forklift image — exact model image not available05-8FBM20T (S.E.)Battery options
Representative forklift image — exact model image not available05-8FBM25TBattery options
Representative forklift image — exact model image not available05-8FBM25T (S.E.)Battery options
Representative forklift image — exact model image not available05-8FBM30TBattery options
Representative forklift image — exact model image not available05-8FBM30T (S.E.)Battery options
Representative forklift image — exact model image not available05-8FBM35TBattery options
Representative forklift image — exact model image not available05-8FBM35T (S.E.)Battery options
Representative forklift image — exact model image not available05-8FBM40T (S.E.)Battery options
Representative forklift image — exact model image not available05-8FBM45T (S.E.)Battery options
Representative forklift image — exact model image not available05-8FBM50T (S.E.)Battery options
Representative forklift image — exact model image not available05-8FBMK25T (S.E.)Battery options
Representative forklift image — exact model image not available05-8FBMK30T (S.E.)Battery options
Representative forklift image — exact model image not available05-9FBMK25TBattery options
Representative forklift image — exact model image not available05-9FBMK30TBattery options
Representative forklift image — exact model image not available5FBC13Battery options
Representative forklift image — exact model image not available5FBC15Battery options
Representative forklift image — exact model image not available5FBC18Battery options
Representative forklift image — exact model image not available5FBC20Battery options
Representative forklift image — exact model image not available5FBC25Battery options
Representative forklift image — exact model image not available5FBC28Battery options
Representative forklift image — exact model image not available5FBC30Battery options
Representative forklift image — exact model image not available5FBCH20Battery options
Representative forklift image — exact model image not available5FBCH25Battery options
Representative forklift image — exact model image not available5FBCHU20Battery options
Representative forklift image — exact model image not available5FBCHU25Battery options
Representative forklift image — exact model image not available5FBCU15Battery options
Representative forklift image — exact model image not available5FBCU18Battery options
Representative forklift image — exact model image not available5FBCU20Battery options
Representative forklift image — exact model image not available5FBCU25Battery options
Representative forklift image — exact model image not available5FBCU28Battery options
Representative forklift image — exact model image not available5FBCU30Battery options
Representative forklift image — exact model image not available5FBE10Battery options
Representative forklift image — exact model image not available5FBE13Battery options
Representative forklift image — exact model image not available5FBE15Battery options
Representative forklift image — exact model image not available5FBE18Battery options
Representative forklift image — exact model image not available5FBE20Battery options
Representative forklift image — exact model image not available6BDRU15Battery options
Representative forklift image — exact model image not available6BNCU15Battery options
Representative forklift image — exact model image not available6BNCU17Battery options
Representative forklift image — exact model image not available6BNCU18Battery options
Representative forklift image — exact model image not available6BNCU19Battery options
Representative forklift image — exact model image not available6BNCUE15Battery options
Representative forklift image — exact model image not available6BNCUE18Battery options
Representative forklift image — exact model image not available6BPU15Battery options
Representative forklift image — exact model image not available6BRU18Battery options
Representative forklift image — exact model image not available6BRU23Battery options
Representative forklift image — exact model image not available6BSU20Battery options
Representative forklift image — exact model image not available6BSU25Battery options
Representative forklift image — exact model image not available6BVNCU13Battery options
Representative forklift image — exact model image not available6BWC10Battery options
Representative forklift image — exact model image not available6BWC15Battery options
Representative forklift image — exact model image not available6BWC20Battery options
Representative forklift image — exact model image not available6BWR15Battery options
Representative forklift image — exact model image not available6BWS10Battery options
Representative forklift image — exact model image not available6BWS11Battery options
Representative forklift image — exact model image not available6BWS13Battery options
Representative forklift image — exact model image not available6BWS15Battery options
Representative forklift image — exact model image not available6BWS20Battery options
Representative forklift image — exact model image not available6DRU15Battery options
Representative forklift image — exact model image not available6FBRE-16Battery options
Representative forklift image — exact model image not available6FBRE-20Battery options
Representative forklift image — exact model image not available6HBC30Battery options
Representative forklift image — exact model image not available6HBC40Battery options
Representative forklift image — exact model image not available6HBE30Battery options
Representative forklift image — exact model image not available6HBE40Battery options
Representative forklift image — exact model image not available6HBW20Battery options
Representative forklift image — exact model image not available6HBW23Battery options
Representative forklift image — exact model image not available6HBW30Battery options
Representative forklift image — exact model image not available6TB50Battery options
Representative forklift image — exact model image not available7BDRU15Battery options
Representative forklift image — exact model image not available7BNCU15Battery options
Representative forklift image — exact model image not available7BNCU18Battery options
Representative forklift image — exact model image not available7BNCU20Battery options
Representative forklift image — exact model image not available7BNCU25Battery options
Representative forklift image — exact model image not available7BPUE15Battery options
Representative forklift image — exact model image not available7BRU18Battery options
Representative forklift image — exact model image not available7BRU23Battery options
Representative forklift image — exact model image not available7BSU20Battery options
Representative forklift image — exact model image not available7BSU25Battery options
Representative forklift image — exact model image not available7BWS10Battery options
Representative forklift image — exact model image not available7BWS13Battery options
Representative forklift image — exact model image not available7FB30Battery options
Representative forklift image — exact model image not available7FBCHU25Battery options
Representative forklift image — exact model image not available7FBCU15Battery options
Representative forklift image — exact model image not available7FBCU18Battery options
Representative forklift image — exact model image not available7FBCU20Battery options
Representative forklift image — exact model image not available7FBCU25Battery options
Representative forklift image — exact model image not available7FBCU30Battery options
Representative forklift image — exact model image not available7FBCU32Battery options
Representative forklift image — exact model image not available7FBCU35Battery options
Representative forklift image — exact model image not available7FBCU45Battery options
Representative forklift image — exact model image not available7FBCU55Battery options
Representative forklift image — exact model image not available7FBE20Battery options
Representative forklift image — exact model image not available7FBEHU18Battery options
Representative forklift image — exact model image not available7FBEU10Battery options
Representative forklift image — exact model image not available7FBEU13Battery options
Representative forklift image — exact model image not available7FBEU15Battery options
Representative forklift image — exact model image not available7FBEU18Battery options
Representative forklift image — exact model image not available7FBEU20Battery options
Representative forklift image — exact model image not available7FBH15Battery options
Representative forklift image — exact model image not available7FBH18Battery options
Representative forklift image — exact model image not available7FBH20Battery options
Representative forklift image — exact model image not available7FBH25Battery options
Representative forklift image — exact model image not available7FBJ35Battery options
Representative forklift image — exact model image not available7FBR15Battery options
Representative forklift image — exact model image not available7FBR18Battery options
Representative forklift image — exact model image not available7HBC30Battery options
Representative forklift image — exact model image not available7HBC40Battery options
Representative forklift image — exact model image not available7HBE30Battery options
Representative forklift image — exact model image not available7HBE40Battery options
Representative forklift image — exact model image not available7HBW23Battery options
Representative forklift image — exact model image not available7HBW30Battery options
Representative forklift image — exact model image not available7TB50Battery options
Representative forklift image — exact model image not available8BDRU15Battery options
Representative forklift image — exact model image not available8BNCU15Battery options
Representative forklift image — exact model image not available8BNCU18Battery options
Representative forklift image — exact model image not available8BNCU20Battery options
Representative forklift image — exact model image not available8BPU15Battery options
Representative forklift image — exact model image not available8BPUE15Battery options
Representative forklift image — exact model image not available8BPUH15Battery options
Representative forklift image — exact model image not available8BRU18Battery options
Representative forklift image — exact model image not available8BRU23Battery options
Representative forklift image — exact model image not available8BWS10Battery options
Representative forklift image — exact model image not available2FB7Battery options
Representative forklift image — exact model image not available2FB9Battery options
Representative forklift image — exact model image not available2FBCA10Battery options
Representative forklift image — exact model image not available2FBCA13Battery options
Representative forklift image — exact model image not available2FBCA15Battery options
Representative forklift image — exact model image not available2FBCA20Battery options
Representative forklift image — exact model image not available2FBCA25Battery options
Representative forklift image — exact model image not available2FBE10Battery options
Representative forklift image — exact model image not available2FBE13Battery options
Representative forklift image — exact model image not available2FBE15Battery options
Representative forklift image — exact model image not available2FBE18Battery options
Representative forklift image — exact model image not available2TE15Battery options
Representative forklift image — exact model image not available3TE25Battery options
Representative forklift image — exact model image not available05-8FBM20T (S.E.)Battery options
Representative forklift image — exact model image not available05-8FBM25TBattery options
Representative forklift image — exact model image not available05-8FBM25T (S.E.)Battery options
Representative forklift image — exact model image not available05-8FBM30TBattery options
Representative forklift image — exact model image not available05-8FBM30T (S.E.)Battery options
Representative forklift image — exact model image not available05-8FBM35TBattery options
Representative forklift image — exact model image not available05-8FBM35T (S.E.)Battery options
Representative forklift image — exact model image not available05-8FBM40T (S.E.)Battery options
Representative forklift image — exact model image not available05-8FBM45T (S.E.)Battery options
Representative forklift image — exact model image not available05-8FBM50T (S.E.)Battery options
Representative forklift image — exact model image not available05-8FBMK25T (S.E.)Battery options
Representative forklift image — exact model image not available05-8FBMK30T (S.E.)Battery options
Representative forklift image — exact model image not available05-9FBMK25TBattery options
Representative forklift image — exact model image not available05-9FBMK30TBattery options
Representative forklift image — exact model image not available5FBC13Battery options
Representative forklift image — exact model image not available5FBC15Battery options
Representative forklift image — exact model image not available5FBC18Battery options
Representative forklift image — exact model image not available5FBC20Battery options
Representative forklift image — exact model image not available5FBC25Battery options
Representative forklift image — exact model image not available5FBC28Battery options
Representative forklift image — exact model image not available5FBC30Battery options
Representative forklift image — exact model image not available5FBCH20Battery options
Representative forklift image — exact model image not available5FBCH25Battery options
Representative forklift image — exact model image not available5FBCHU20Battery options
Representative forklift image — exact model image not available5FBCHU25Battery options
Representative forklift image — exact model image not available5FBCU15Battery options
Representative forklift image — exact model image not available5FBCU18Battery options
Representative forklift image — exact model image not available5FBCU20Battery options
Representative forklift image — exact model image not available5FBCU25Battery options
Representative forklift image — exact model image not available5FBCU28Battery options
Representative forklift image — exact model image not available5FBCU30Battery options
Representative forklift image — exact model image not available5FBE10Battery options
Representative forklift image — exact model image not available5FBE13Battery options
Representative forklift image — exact model image not available5FBE15Battery options
Representative forklift image — exact model image not available5FBE18Battery options
Representative forklift image — exact model image not available5FBE20Battery options
Representative forklift image — exact model image not available6BDRU15Battery options
Representative forklift image — exact model image not available6BNCU15Battery options
Representative forklift image — exact model image not available6BNCU17Battery options
Representative forklift image — exact model image not available6BNCU18Battery options
Representative forklift image — exact model image not available6BNCU19Battery options
Representative forklift image — exact model image not available6BNCUE15Battery options
Representative forklift image — exact model image not available6BNCUE18Battery options
Representative forklift image — exact model image not available6BPU15Battery options
Representative forklift image — exact model image not available6BRU18Battery options
Representative forklift image — exact model image not available6BRU23Battery options
Representative forklift image — exact model image not available6BSU20Battery options
Representative forklift image — exact model image not available6BSU25Battery options
Representative forklift image — exact model image not available6BVNCU13Battery options
Representative forklift image — exact model image not available6BWC10Battery options
Representative forklift image — exact model image not available6BWC15Battery options
Representative forklift image — exact model image not available6BWC20Battery options
Representative forklift image — exact model image not available6BWR15Battery options
Representative forklift image — exact model image not available6BWS10Battery options
Representative forklift image — exact model image not available6BWS11Battery options
Representative forklift image — exact model image not available6BWS13Battery options
Representative forklift image — exact model image not available6BWS15Battery options
Representative forklift image — exact model image not available6BWS20Battery options
Representative forklift image — exact model image not available6DRU15Battery options
Representative forklift image — exact model image not available6FBRE-16Battery options
Representative forklift image — exact model image not available6FBRE-20Battery options
Representative forklift image — exact model image not available6HBC30Battery options
Representative forklift image — exact model image not available6HBC40Battery options
Representative forklift image — exact model image not available6HBE30Battery options
Representative forklift image — exact model image not available6HBE40Battery options
Representative forklift image — exact model image not available6HBW20Battery options
Representative forklift image — exact model image not available6HBW23Battery options
Representative forklift image — exact model image not available6HBW30Battery options
Representative forklift image — exact model image not available6TB50Battery options
Representative forklift image — exact model image not available7BDRU15Battery options
Representative forklift image — exact model image not available7BNCU15Battery options
Representative forklift image — exact model image not available7BNCU18Battery options
Representative forklift image — exact model image not available7BNCU20Battery options
Representative forklift image — exact model image not available7BNCU25Battery options
Representative forklift image — exact model image not available7BPUE15Battery options
Representative forklift image — exact model image not available7BRU18Battery options
Representative forklift image — exact model image not available7BRU23Battery options
Representative forklift image — exact model image not available7BSU20Battery options
Representative forklift image — exact model image not available7BSU25Battery options
Representative forklift image — exact model image not available7BWS10Battery options
Representative forklift image — exact model image not available7BWS13Battery options
Representative forklift image — exact model image not available7FB30Battery options
Representative forklift image — exact model image not available7FBCHU25Battery options
Representative forklift image — exact model image not available7FBCU15Battery options
Representative forklift image — exact model image not available7FBCU18Battery options
Representative forklift image — exact model image not available7FBCU20Battery options
Representative forklift image — exact model image not available7FBCU25Battery options
Representative forklift image — exact model image not available7FBCU30Battery options
Representative forklift image — exact model image not available7FBCU32Battery options
Representative forklift image — exact model image not available7FBCU35Battery options
Representative forklift image — exact model image not available7FBCU45Battery options
Representative forklift image — exact model image not available7FBCU55Battery options
Representative forklift image — exact model image not available7FBE20Battery options
Representative forklift image — exact model image not available7FBEHU18Battery options
Representative forklift image — exact model image not available7FBEU10Battery options
Representative forklift image — exact model image not available7FBEU13Battery options
Representative forklift image — exact model image not available7FBEU15Battery options
Representative forklift image — exact model image not available7FBEU18Battery options
Representative forklift image — exact model image not available7FBEU20Battery options
Representative forklift image — exact model image not available7FBH15Battery options
Representative forklift image — exact model image not available7FBH18Battery options
Representative forklift image — exact model image not available7FBH20Battery options
Representative forklift image — exact model image not available7FBH25Battery options
Representative forklift image — exact model image not available7FBJ35Battery options
Representative forklift image — exact model image not available7FBR15Battery options
Representative forklift image — exact model image not available7FBR18Battery options
Representative forklift image — exact model image not available7HBC30Battery options
Representative forklift image — exact model image not available7HBC40Battery options
Representative forklift image — exact model image not available7HBE30Battery options
Representative forklift image — exact model image not available7HBE40Battery options
Representative forklift image — exact model image not available7HBW23Battery options
Representative forklift image — exact model image not available7HBW30Battery options
Representative forklift image — exact model image not available7TB50Battery options
Representative forklift image — exact model image not available8BDRU15Battery options
Representative forklift image — exact model image not available8BNCU15Battery options
Representative forklift image — exact model image not available8BNCU18Battery options
Representative forklift image — exact model image not available8BNCU20Battery options
Representative forklift image — exact model image not available8BPU15Battery options
Representative forklift image — exact model image not available8BPUE15Battery options
Representative forklift image — exact model image not available8BPUH15Battery options
Representative forklift image — exact model image not available8BRU18Battery options
Representative forklift image — exact model image not available8BRU23Battery options
Representative forklift image — exact model image not available8BWS10Battery options
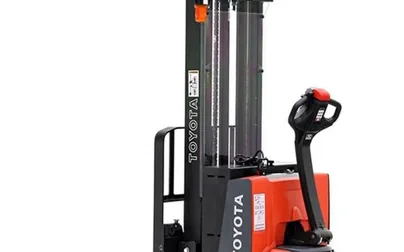 8BWS10 (8" box)Battery options
Representative forklift image — exact model image not available8BWS13Battery options
8BWS10 (8" box)Battery options
Representative forklift image — exact model image not available8BWS13Battery options
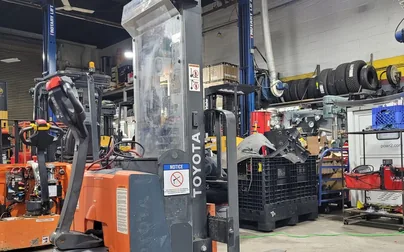 8BWS13 (8" box)Battery options
Representative forklift image — exact model image not available8FBC15UBattery options
Representative forklift image — exact model image not available8FBC18UBattery options
Representative forklift image — exact model image not available8FBCHU25Battery options
Representative forklift image — exact model image not available8FBCU15Battery options
Representative forklift image — exact model image not available8FBCU18Battery options
Representative forklift image — exact model image not available8FBCU20Battery options
Representative forklift image — exact model image not available8FBCU20-COMPBattery options
Representative forklift image — exact model image not available8FBCU25Battery options
Representative forklift image — exact model image not available8FBCU25-COMPBattery options
Representative forklift image — exact model image not available8FBCU28Battery options
Representative forklift image — exact model image not available8FBCU30Battery options
Representative forklift image — exact model image not available8FBCU32Battery options
Representative forklift image — exact model image not available8FBE15Battery options
Representative forklift image — exact model image not available8FBE15UBattery options
Representative forklift image — exact model image not available8FBE18Battery options
Representative forklift image — exact model image not available8FBE18UBattery options
Representative forklift image — exact model image not available8FBE20UBattery options
Representative forklift image — exact model image not available8FBEH18UBattery options
Representative forklift image — exact model image not available8FBES15UBattery options
Representative forklift image — exact model image not available8FBH15Battery options
Representative forklift image — exact model image not available8FBH18Battery options
Representative forklift image — exact model image not available8FBH20Battery options
Representative forklift image — exact model image not available8FBH25Battery options
Representative forklift image — exact model image not available8FBM16Battery options
Representative forklift image — exact model image not available8FBM16TBattery options
Representative forklift image — exact model image not available8FBM18TBattery options
Representative forklift image — exact model image not available8FBM20TBattery options
Representative forklift image — exact model image not available8FBM30TBattery options
Representative forklift image — exact model image not available8FBM40TBattery options
Representative forklift image — exact model image not available8FBM45TBattery options
Representative forklift image — exact model image not available8FBM50TBattery options
Representative forklift image — exact model image not available8FBMK16TBattery options
Representative forklift image — exact model image not available8FBMK20TBattery options
Representative forklift image — exact model image not available8HBC30Battery options
Representative forklift image — exact model image not available8HBC40Battery options
Representative forklift image — exact model image not available8HBC40ABattery options
Representative forklift image — exact model image not available8HBE30Battery options
Representative forklift image — exact model image not available8HBE40Battery options
Representative forklift image — exact model image not available8HBW23Battery options
8BWS13 (8" box)Battery options
Representative forklift image — exact model image not available8FBC15UBattery options
Representative forklift image — exact model image not available8FBC18UBattery options
Representative forklift image — exact model image not available8FBCHU25Battery options
Representative forklift image — exact model image not available8FBCU15Battery options
Representative forklift image — exact model image not available8FBCU18Battery options
Representative forklift image — exact model image not available8FBCU20Battery options
Representative forklift image — exact model image not available8FBCU20-COMPBattery options
Representative forklift image — exact model image not available8FBCU25Battery options
Representative forklift image — exact model image not available8FBCU25-COMPBattery options
Representative forklift image — exact model image not available8FBCU28Battery options
Representative forklift image — exact model image not available8FBCU30Battery options
Representative forklift image — exact model image not available8FBCU32Battery options
Representative forklift image — exact model image not available8FBE15Battery options
Representative forklift image — exact model image not available8FBE15UBattery options
Representative forklift image — exact model image not available8FBE18Battery options
Representative forklift image — exact model image not available8FBE18UBattery options
Representative forklift image — exact model image not available8FBE20UBattery options
Representative forklift image — exact model image not available8FBEH18UBattery options
Representative forklift image — exact model image not available8FBES15UBattery options
Representative forklift image — exact model image not available8FBH15Battery options
Representative forklift image — exact model image not available8FBH18Battery options
Representative forklift image — exact model image not available8FBH20Battery options
Representative forklift image — exact model image not available8FBH25Battery options
Representative forklift image — exact model image not available8FBM16Battery options
Representative forklift image — exact model image not available8FBM16TBattery options
Representative forklift image — exact model image not available8FBM18TBattery options
Representative forklift image — exact model image not available8FBM20TBattery options
Representative forklift image — exact model image not available8FBM30TBattery options
Representative forklift image — exact model image not available8FBM40TBattery options
Representative forklift image — exact model image not available8FBM45TBattery options
Representative forklift image — exact model image not available8FBM50TBattery options
Representative forklift image — exact model image not available8FBMK16TBattery options
Representative forklift image — exact model image not available8FBMK20TBattery options
Representative forklift image — exact model image not available8HBC30Battery options
Representative forklift image — exact model image not available8HBC40Battery options
Representative forklift image — exact model image not available8HBC40ABattery options
Representative forklift image — exact model image not available8HBE30Battery options
Representative forklift image — exact model image not available8HBE40Battery options
Representative forklift image — exact model image not available8HBW23Battery options
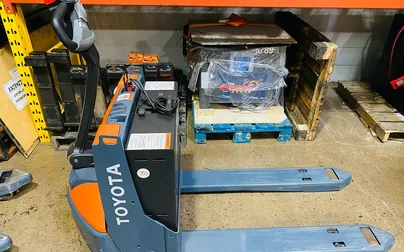 8HBW23 (8" box)Battery options
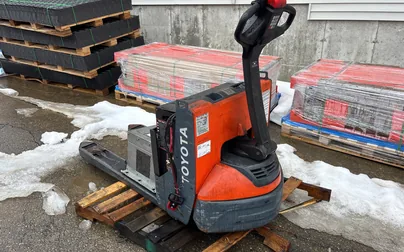 8HBW23 (9" box)Battery options
Representative forklift image — exact model image not available8HBW30Battery options
Representative forklift image — exact model image not available8TB50Battery options
Representative forklift image — exact model image not available8TB50ABattery options
Representative forklift image — exact model image not available9BDRU13Battery options
Representative forklift image — exact model image not available9BDRU15Battery options
Representative forklift image — exact model image not available9BRU18Battery options
Representative forklift image — exact model image not available9BRU23Battery options
Representative forklift image — exact model image not available9FBH25TBattery options
Representative forklift image — exact model image not available9FBH30TBattery options
Representative forklift image — exact model image not available9FBM25TBattery options
Representative forklift image — exact model image not available9FBM30TBattery options
Representative forklift image — exact model image not available9FBM35TBattery options
Representative forklift image — exact model image not available30-5FBCHU20Battery options
Representative forklift image — exact model image not available30-5FBCHU25Battery options
Representative forklift image — exact model image not available30-5FBCU15Battery options
Representative forklift image — exact model image not available30-5FBCU18Battery options
Representative forklift image — exact model image not available30-5FBCU20Battery options
Representative forklift image — exact model image not available30-5FBCU25Battery options
Representative forklift image — exact model image not available30-5FBCU30Battery options
Representative forklift image — exact model image not available30-7FBCHU25Battery options
Representative forklift image — exact model image not available30-7FBCU15Battery options
Representative forklift image — exact model image not available30-7FBCU18Battery options
Representative forklift image — exact model image not available30-7FBCU20Battery options
Representative forklift image — exact model image not available30-7FBCU25Battery options
Representative forklift image — exact model image not available30-7FBCU30Battery options
Representative forklift image — exact model image not available30-7FBCU32Battery options
Representative forklift image — exact model image not available30-7FBCU35Battery options
Representative forklift image — exact model image not available30-7FBCU45Battery options
Representative forklift image — exact model image not available30-7FBCU55Battery options
Representative forklift image — exact model image not available35FCB-35Battery options
Representative forklift image — exact model image not availableCBT4Battery options
Representative forklift image — exact model image not availableCBT4 - NO ROLLERSBattery options
Representative forklift image — exact model image not availableCBT4 - WITH ROLLERSBattery options
Representative forklift image — exact model image not availableCBT6Battery options
Representative forklift image — exact model image not availableCBT6 - NO ROLLERSBattery options
Representative forklift image — exact model image not availableCBT6 - WITH ROLLERSBattery options
Representative forklift image — exact model image not availableCBTY4Battery options
Representative forklift image — exact model image not availableCR1-LP60Battery options
Representative forklift image — exact model image not availableCR1-LP80Battery options
Representative forklift image — exact model image not availableER1-ES60Battery options
Representative forklift image — exact model image not availableER1-ES80Battery options
Representative forklift image — exact model image not availableFBA10Battery options
Representative forklift image — exact model image not availableFBA15Battery options
Representative forklift image — exact model image not availableFBA20Battery options
Representative forklift image — exact model image not availableFBA25Battery options
Representative forklift image — exact model image not availableFBCA10Battery options
Representative forklift image — exact model image not availableFBCA15Battery options
Representative forklift image — exact model image not availableFBCA20Battery options
Representative forklift image — exact model image not availableFBCA25Battery options
Representative forklift image — exact model image not availableFBCA30Battery options
Representative forklift image — exact model image not availableFBM-25Battery options
Representative forklift image — exact model image not availableHB20Battery options
Representative forklift image — exact model image not availableHB30Battery options
Representative forklift image — exact model image not availableHBA20Battery options
Representative forklift image — exact model image not availableHBWA20Battery options
Representative forklift image — exact model image not availableHBWA30Battery options
Representative forklift image — exact model image not availableHPT35Battery options
Representative forklift image — exact model image not availableRF1-BE1X35Battery options
Representative forklift image — exact model image not availableRF1-BE1X40Battery options
Representative forklift image — exact model image not availableRF1-BE2X25Battery options
Representative forklift image — exact model image not availableRF1-BH1X35Battery options
Representative forklift image — exact model image not availableRF1-BH1X40Battery options
Representative forklift image — exact model image not availableRF1-BH1X45Battery options
Representative forklift image — exact model image not availableRF1-BH2X25Battery options
Representative forklift image — exact model image not availableRF1-BH2X30Battery options
Representative forklift image — exact model image not availableRF1-HC1X45Battery options
Representative forklift image — exact model image not availableRF1-HC1Z45Battery options
Representative forklift image — exact model image not availableRF1-HC2X32Battery options
Representative forklift image — exact model image not availableRF1-HC2Z32Battery options
Representative forklift image — exact model image not availableRF1-HP1X45Battery options
Representative forklift image — exact model image not availableRF1-HP1Z45Battery options
Representative forklift image — exact model image not availableRF1-HP2X32Battery options
Representative forklift image — exact model image not availableRF1-HP2Z32Battery options
Representative forklift image — exact model image not availableRF1-MD1X45Battery options
Representative forklift image — exact model image not availableRF1-SD1X35Battery options
Representative forklift image — exact model image not availableRF1-SD1X45Battery options
Representative forklift image — exact model image not availableRF1-SD1Z45Battery options
Representative forklift image — exact model image not availableRF1-SD2X32Battery options
Representative forklift image — exact model image not availableRF1-SD2Z32Battery options
Representative forklift image — exact model image not availableRRE140HBattery options
Representative forklift image — exact model image not availableRRE160HBattery options
Representative forklift image — exact model image not availableRRE160HRBattery options
Representative forklift image — exact model image not availableRRE180HBattery options
Representative forklift image — exact model image not availableRRE200HBattery options
Representative forklift image — exact model image not availableRRE250HBattery options
Representative forklift image — exact model image not availableSR1-BEF30Battery options
Representative forklift image — exact model image not availableSR1-BEF35Battery options
Representative forklift image — exact model image not availableSR1-BEF40Battery options
Representative forklift image — exact model image not availableSR1-BET30Battery options
Representative forklift image — exact model image not availableSR1-BET35Battery options
Representative forklift image — exact model image not availableSR1-BET40Battery options
Representative forklift image — exact model image not availableSR1-HPF30Battery options
Representative forklift image — exact model image not availableSR1-HPF35Battery options
Representative forklift image — exact model image not availableSR1-HPF40Battery options
Representative forklift image — exact model image not availableSR1-HPF50Battery options
Representative forklift image — exact model image not availableSR1-HPFM30Battery options
Representative forklift image — exact model image not availableSR1-HPFM35Battery options
Representative forklift image — exact model image not availableSR1-HPFM40Battery options
Representative forklift image — exact model image not availableSR1-HPM30Battery options
Representative forklift image — exact model image not availableSR1-HPM35Battery options
Representative forklift image — exact model image not availableSR1-HPM40Battery options
Representative forklift image — exact model image not availableSR1-HPM50Battery options
Representative forklift image — exact model image not availableSR1-HPT30Battery options
Representative forklift image — exact model image not availableSR1-HPT35Battery options
Representative forklift image — exact model image not availableSR1-HPT40Battery options
Representative forklift image — exact model image not availableSR1-HPT50Battery options
Representative forklift image — exact model image not availableTEA15Battery options
Representative forklift image — exact model image not availableTHDE1500-24Battery options
Representative forklift image — exact model image not availableTHDE1800-24Battery options
Representative forklift image — exact model image not availableTHDE2000-24Battery options
Representative forklift image — exact model image not availableTHDE2200-24Battery options
Representative forklift image — exact model image not availableTHDE3000-24Battery options
Representative forklift image — exact model image not availableTHDE3000-30Battery options
Representative forklift image — exact model image not availableTHDE3500-24Battery options
Representative forklift image — exact model image not availableTHDE3500-30Battery options
Representative forklift image — exact model image not availableTHDE4000-24Battery options
Representative forklift image — exact model image not availableTHDE4000-30Battery options
8HBW23 (9" box)Battery options
Representative forklift image — exact model image not available8HBW30Battery options
Representative forklift image — exact model image not available8TB50Battery options
Representative forklift image — exact model image not available8TB50ABattery options
Representative forklift image — exact model image not available9BDRU13Battery options
Representative forklift image — exact model image not available9BDRU15Battery options
Representative forklift image — exact model image not available9BRU18Battery options
Representative forklift image — exact model image not available9BRU23Battery options
Representative forklift image — exact model image not available9FBH25TBattery options
Representative forklift image — exact model image not available9FBH30TBattery options
Representative forklift image — exact model image not available9FBM25TBattery options
Representative forklift image — exact model image not available9FBM30TBattery options
Representative forklift image — exact model image not available9FBM35TBattery options
Representative forklift image — exact model image not available30-5FBCHU20Battery options
Representative forklift image — exact model image not available30-5FBCHU25Battery options
Representative forklift image — exact model image not available30-5FBCU15Battery options
Representative forklift image — exact model image not available30-5FBCU18Battery options
Representative forklift image — exact model image not available30-5FBCU20Battery options
Representative forklift image — exact model image not available30-5FBCU25Battery options
Representative forklift image — exact model image not available30-5FBCU30Battery options
Representative forklift image — exact model image not available30-7FBCHU25Battery options
Representative forklift image — exact model image not available30-7FBCU15Battery options
Representative forklift image — exact model image not available30-7FBCU18Battery options
Representative forklift image — exact model image not available30-7FBCU20Battery options
Representative forklift image — exact model image not available30-7FBCU25Battery options
Representative forklift image — exact model image not available30-7FBCU30Battery options
Representative forklift image — exact model image not available30-7FBCU32Battery options
Representative forklift image — exact model image not available30-7FBCU35Battery options
Representative forklift image — exact model image not available30-7FBCU45Battery options
Representative forklift image — exact model image not available30-7FBCU55Battery options
Representative forklift image — exact model image not available35FCB-35Battery options
Representative forklift image — exact model image not availableCBT4Battery options
Representative forklift image — exact model image not availableCBT4 - NO ROLLERSBattery options
Representative forklift image — exact model image not availableCBT4 - WITH ROLLERSBattery options
Representative forklift image — exact model image not availableCBT6Battery options
Representative forklift image — exact model image not availableCBT6 - NO ROLLERSBattery options
Representative forklift image — exact model image not availableCBT6 - WITH ROLLERSBattery options
Representative forklift image — exact model image not availableCBTY4Battery options
Representative forklift image — exact model image not availableCR1-LP60Battery options
Representative forklift image — exact model image not availableCR1-LP80Battery options
Representative forklift image — exact model image not availableER1-ES60Battery options
Representative forklift image — exact model image not availableER1-ES80Battery options
Representative forklift image — exact model image not availableFBA10Battery options
Representative forklift image — exact model image not availableFBA15Battery options
Representative forklift image — exact model image not availableFBA20Battery options
Representative forklift image — exact model image not availableFBA25Battery options
Representative forklift image — exact model image not availableFBCA10Battery options
Representative forklift image — exact model image not availableFBCA15Battery options
Representative forklift image — exact model image not availableFBCA20Battery options
Representative forklift image — exact model image not availableFBCA25Battery options
Representative forklift image — exact model image not availableFBCA30Battery options
Representative forklift image — exact model image not availableFBM-25Battery options
Representative forklift image — exact model image not availableHB20Battery options
Representative forklift image — exact model image not availableHB30Battery options
Representative forklift image — exact model image not availableHBA20Battery options
Representative forklift image — exact model image not availableHBWA20Battery options
Representative forklift image — exact model image not availableHBWA30Battery options
Representative forklift image — exact model image not availableHPT35Battery options
Representative forklift image — exact model image not availableRF1-BE1X35Battery options
Representative forklift image — exact model image not availableRF1-BE1X40Battery options
Representative forklift image — exact model image not availableRF1-BE2X25Battery options
Representative forklift image — exact model image not availableRF1-BH1X35Battery options
Representative forklift image — exact model image not availableRF1-BH1X40Battery options
Representative forklift image — exact model image not availableRF1-BH1X45Battery options
Representative forklift image — exact model image not availableRF1-BH2X25Battery options
Representative forklift image — exact model image not availableRF1-BH2X30Battery options
Representative forklift image — exact model image not availableRF1-HC1X45Battery options
Representative forklift image — exact model image not availableRF1-HC1Z45Battery options
Representative forklift image — exact model image not availableRF1-HC2X32Battery options
Representative forklift image — exact model image not availableRF1-HC2Z32Battery options
Representative forklift image — exact model image not availableRF1-HP1X45Battery options
Representative forklift image — exact model image not availableRF1-HP1Z45Battery options
Representative forklift image — exact model image not availableRF1-HP2X32Battery options
Representative forklift image — exact model image not availableRF1-HP2Z32Battery options
Representative forklift image — exact model image not availableRF1-MD1X45Battery options
Representative forklift image — exact model image not availableRF1-SD1X35Battery options
Representative forklift image — exact model image not availableRF1-SD1X45Battery options
Representative forklift image — exact model image not availableRF1-SD1Z45Battery options
Representative forklift image — exact model image not availableRF1-SD2X32Battery options
Representative forklift image — exact model image not availableRF1-SD2Z32Battery options
Representative forklift image — exact model image not availableRRE140HBattery options
Representative forklift image — exact model image not availableRRE160HBattery options
Representative forklift image — exact model image not availableRRE160HRBattery options
Representative forklift image — exact model image not availableRRE180HBattery options
Representative forklift image — exact model image not availableRRE200HBattery options
Representative forklift image — exact model image not availableRRE250HBattery options
Representative forklift image — exact model image not availableSR1-BEF30Battery options
Representative forklift image — exact model image not availableSR1-BEF35Battery options
Representative forklift image — exact model image not availableSR1-BEF40Battery options
Representative forklift image — exact model image not availableSR1-BET30Battery options
Representative forklift image — exact model image not availableSR1-BET35Battery options
Representative forklift image — exact model image not availableSR1-BET40Battery options
Representative forklift image — exact model image not availableSR1-HPF30Battery options
Representative forklift image — exact model image not availableSR1-HPF35Battery options
Representative forklift image — exact model image not availableSR1-HPF40Battery options
Representative forklift image — exact model image not availableSR1-HPF50Battery options
Representative forklift image — exact model image not availableSR1-HPFM30Battery options
Representative forklift image — exact model image not availableSR1-HPFM35Battery options
Representative forklift image — exact model image not availableSR1-HPFM40Battery options
Representative forklift image — exact model image not availableSR1-HPM30Battery options
Representative forklift image — exact model image not availableSR1-HPM35Battery options
Representative forklift image — exact model image not availableSR1-HPM40Battery options
Representative forklift image — exact model image not availableSR1-HPM50Battery options
Representative forklift image — exact model image not availableSR1-HPT30Battery options
Representative forklift image — exact model image not availableSR1-HPT35Battery options
Representative forklift image — exact model image not availableSR1-HPT40Battery options
Representative forklift image — exact model image not availableSR1-HPT50Battery options
Representative forklift image — exact model image not availableTEA15Battery options
Representative forklift image — exact model image not availableTHDE1500-24Battery options
Representative forklift image — exact model image not availableTHDE1800-24Battery options
Representative forklift image — exact model image not availableTHDE2000-24Battery options
Representative forklift image — exact model image not availableTHDE2200-24Battery options
Representative forklift image — exact model image not availableTHDE3000-24Battery options
Representative forklift image — exact model image not availableTHDE3000-30Battery options
Representative forklift image — exact model image not availableTHDE3500-24Battery options
Representative forklift image — exact model image not availableTHDE3500-30Battery options
Representative forklift image — exact model image not availableTHDE4000-24Battery options
Representative forklift image — exact model image not availableTHDE4000-30Battery optionsNo Toyota model matches that search. Send the data plate details and a specialist will confirm the right set.
Need help confirming fitment?
Send what you have and a Radian battery specialist will confirm the configuration. A clear photo of the data plate is usually enough to start.
Useful to have
- Model
- System voltage
- Battery count
- Battery compartment dimensions
- Photo of the data plate